Help
Push Template
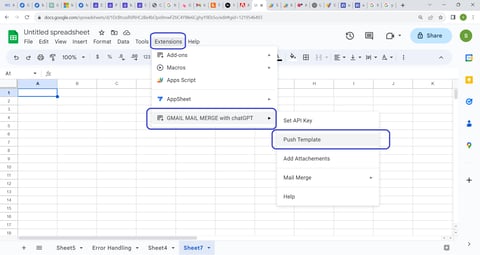
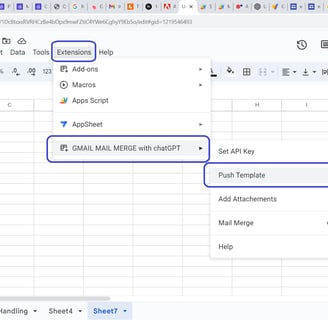
Open Google Sheets that you want to work with.
Click on the extensions menu item.
Select the G-Mail Merge with chatGPT.
Select the sub-menu Push Template.
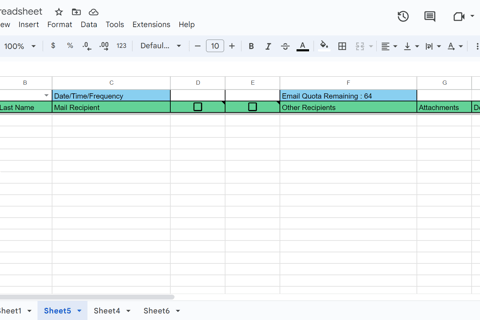
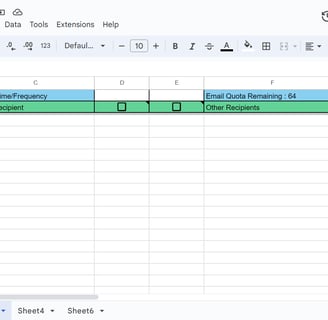
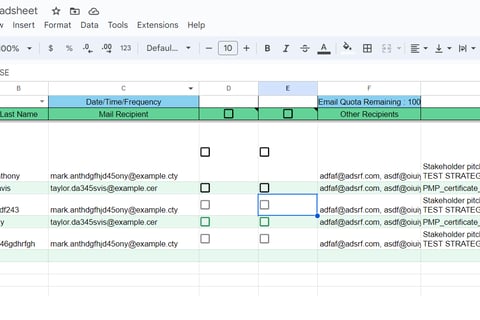
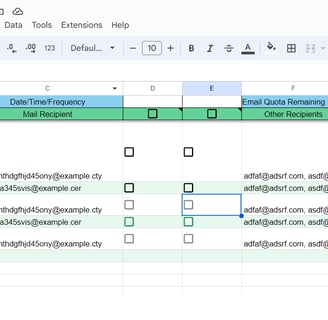
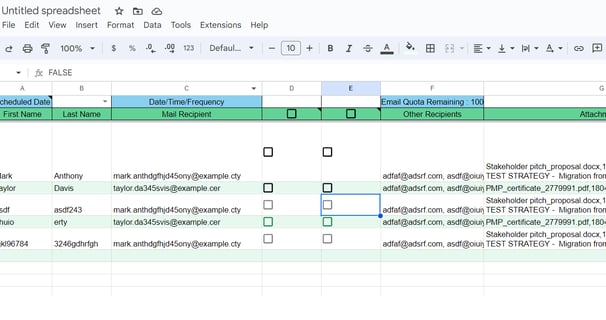
The Google Sheet gets populated with the header information.
Also the input fields for scheduling the emails.
And the Email Quota Remaining field.
Please note Push Template acts as a mean to refresh the header information and also refresh the formating of the excel.
Please note that fields A2:H2 is header information and static in nature.
The variable text to be included has to be beyond column 'H' and must be in row no. 2. for any presonalization. e.g. cells I2, J2, K2...etc. can be considered for variable text for personalization.
Schedule Emails
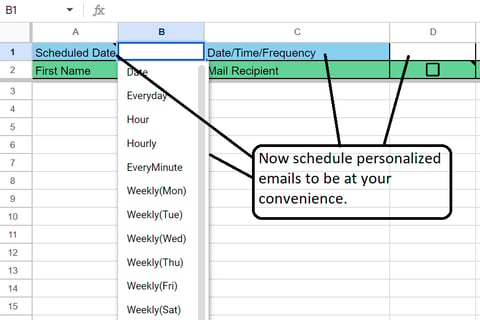
Schedule emails at variable frequencies.
Schedule it hourly/daily/weekly or monthly.
Set the day of the month if scheduled monthly.
Set the day of the week if scheduled weekly.
You can hover your mouse over the cell A1(Scheduled Date) to see the tool tip information to set the Schedule for email delivery in Google Sheet.

chatGPT
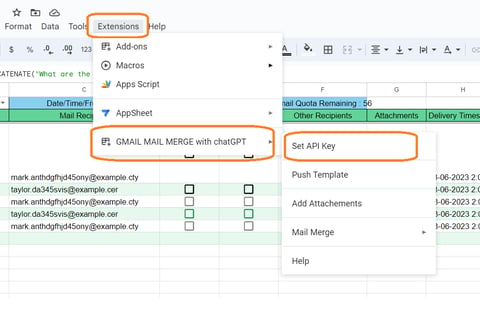
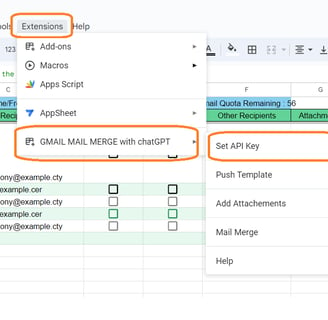
From the G-Mail Merge with chatGPT addon menu select the sub-menu item Set API Key.
Enter your OpenAI API key(get it from here).
Click Ok.
You are all set to take advantage of the chatGPT's potential in your Google Sheets.
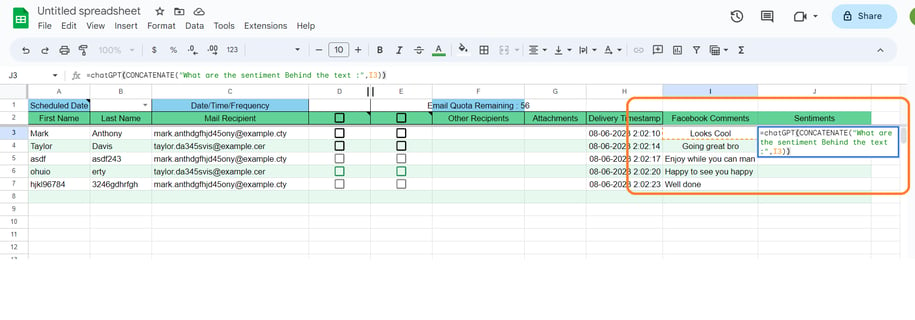
Make use of the custom formula =chatGPT() and ask anything to the AI engine.
While using custom function =chatGPT() please use Temparature parameter as '1' for better results.
Use this custom formula with Google sheet's inbuilt formula to make your parsing the sheet fully automated and as per your wish.
eg. =chatGPT(CONCATENATE("Text", columns in the sheet(e.g. B4), "Text", C4))
Please note: you can set the Temperature and maximum Tokens in the custom function as they are optional parameters.

Add Attachments
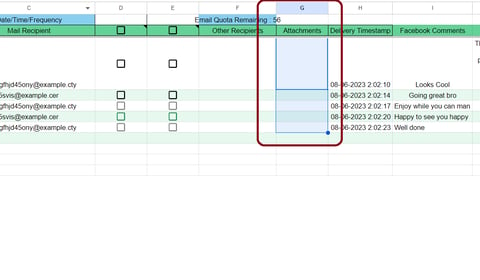
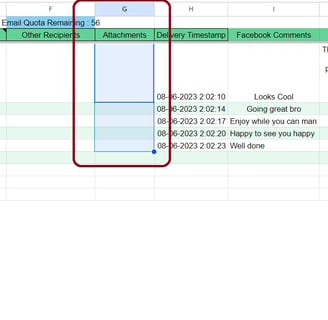
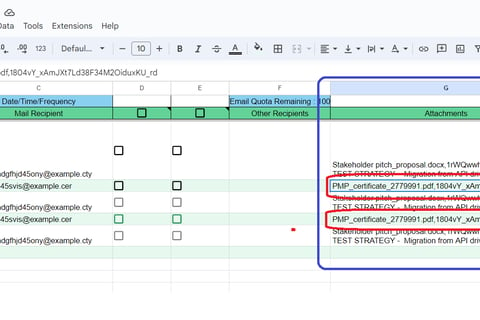
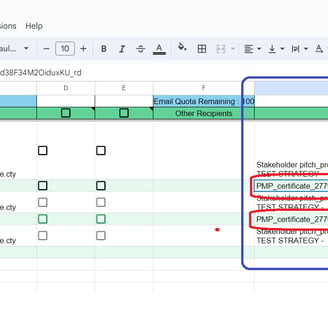
In the Google sheet select the corresponding range of cells for the recipient email ids for which you want to attach multiple files under Column G (with header "Attachments").
You can also select different files to be uploaded to different recipients.
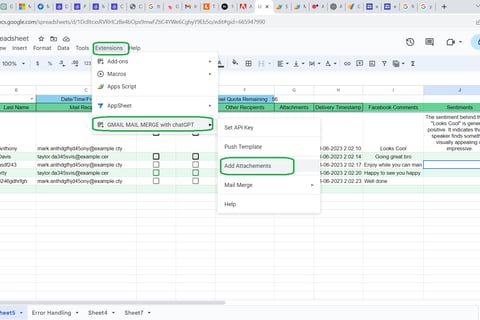
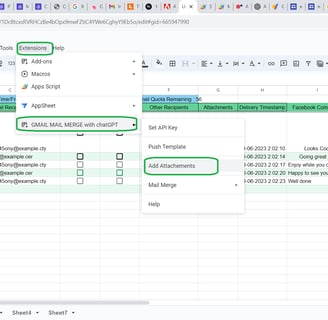
From the "G-Mail Merge with chatGPT" addon custom menu click on the sub-menu "Add Attachments".
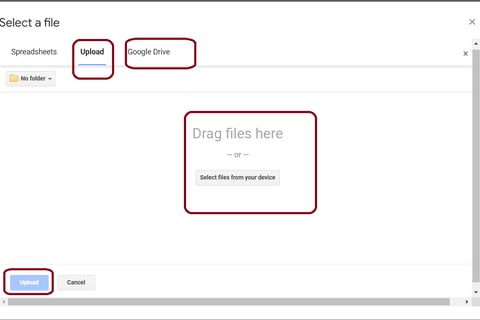
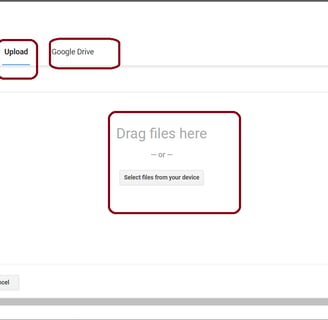
Dialog opens up from where you can select your files from Google Drive or upload directly from your computer.
Once files are selected click Upload.
Column G (Attachments) will be populated with the name of the file and its Unique ID.
You can upload multiple files and different files to each email recipient as shown in the snippet.
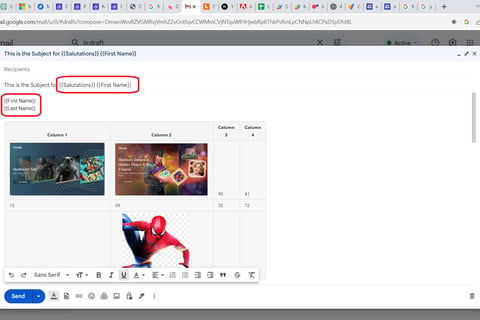
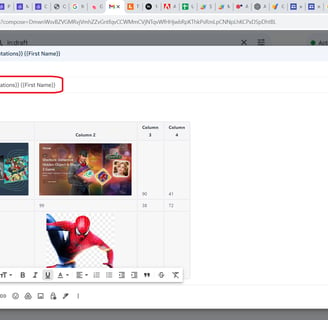
Customize Email
Open your Gmail compose an email.
Include in the body of the email what personalized text you want by putting it in the placeholder "{{Variable Text}}".
This Variable text should also be included in the Row No. 2 of your Google Sheet (Push Template).
You can include any no. of Variable Text in the body by including it also in the Google Sheet header(Row No. 2) after column H. e.g. I2, J2, K2, L2...etc.
Combine this Personalization feature along with custom function chatGPT to exploit full potential of the G-Mail Merge with chatGPT Addon.
Add Inline images or add attachments to the draft.
Preview mail
Once the customized/personalized email draft has been created, save it.
Fill in the Google sheet with the recipient information. Also, if you want to 'Cc' or 'Bcc' some list of email then include them (comma ',' separated) in the 'Other Recipient' column.
Go to the G-Mail Merge with chatGPT addon custom Menu and select "Mail Merge" and then select sub-menu Preview Email.
The registered user of the G-Mail Merge with chatGPT addon will receive the first email listed in the Google sheet along with all the attachments, inline images and personalized text.
Broadcast mail
Once the mail has be previewed.
Fill in the Google sheet with the recipient information. Also, if you want to 'Cc' or 'Bcc' some list of email then include them (comma ',' separated) in the 'Other Recipient' column.
Go to the G-Mail Merge with chatGPT addon custom Menu and select "Mail Merge" and then select sub-menu Broadcast Email.
The broadcast mail will be executed and will take its time based on the no. of size of the email and no. of variable text in the email body.
At the end it will update the column H with the deliverey timestamp.
Error Handling
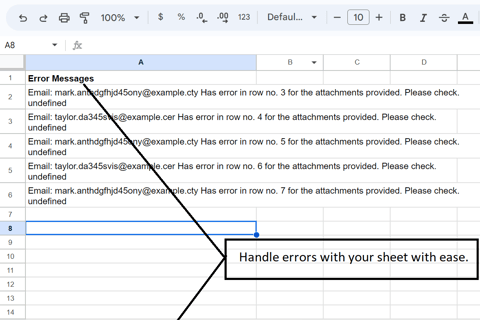
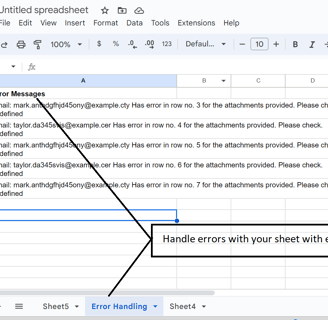
There may be cases when your Google sheet may not be quite appropriate or lacking due diligence. For that We at ElephantRohck has incorporated Error Handling.
In your google Spreadsheet a new sheet named "Error Handling"will be created. With all the error messages listed in it, when you execute Mail Merge
AVOID SPAM - How to avoid automatic movement of your sent emails to spam:
Using SPF:
Sender Policy Framework (SPF) is used to authenticate email messages sent from your domain by specifying which mail servers are allowed to send email on behalf of your domain. Implementing an SPF record for your domain can help prevent spammers from sending emails that appear to come from your domain.
Here’s how you can set up an SPF record for your domain:
1. Identify which mail servers send mail on behalf of your domain:
Your own mail servers.
Third-party providers like email marketing tools or transactional email services.
2. Construct your SPF record: The basic format is:
css
Copy code
v=spf1 [list-of-servers] -all
For example, if your domain uses Google Workspace (formerly G Suite) for sending emails, your SPF might look like:
makefile
Copy code
v=spf1 include:_spf.google.com -all
If you send emails from Google Workspace and an email marketing tool, it might look like:
makefile
Copy code
v=spf1 include:_spf.google.com include:spf.emailmarketingtool.com -all
Here's a breakdown of the elements:
v=spf1: This specifies the version of SPF being used.
include: This states which servers are allowed to send mail for the domain.
-all: This means that no other servers than the ones specified are allowed to send email.
3. Add your SPF record to your domain’s DNS settings: You’ll need to add the SPF record as a TXT record in your domain's DNS settings. Depending on your domain registrar or DNS hosting provider, the exact steps to do this will vary. Generally:
Log into your domain registrar or DNS hosting provider.
Navigate to the section where you can edit your domain’s DNS records.
Add a new TXT record.
For the "Name/Host/Alias" field, you can typically leave it blank or enter "@".
For the "Value/Answer/Destination" field, enter the SPF record you've constructed.
Save the record.
4. Verify your SPF record: After adding the record, you should wait for a while (due to DNS propagation) and then verify if it’s set up correctly. You can use online tools like MX Toolbox SPF Record Check for this purpose.
5. Be mindful of the 10 DNS lookup limit: An SPF record can have at most 10 DNS lookups. This can be quickly exhausted if you use many third-party providers that require include mechanisms. Exceeding this limit means the SPF record will fail to evaluate correctly.
6. Monitor and adjust: Regularly review your SPF records, especially if you add or change email service providers.
Remember, while SPF is a valuable tool to authenticate your emails, it’s even more effective when used in conjunction with other email authentication mechanisms like DKIM (DomainKeys Identified Mail) and DMARC (Domain-based Message Authentication, Reporting & Conformance).
Using DKIM:
Setting up DKIM for a domain using Google Workspace (formerly G Suite) involves generating a DKIM key in the Google Admin console and then adding that key as a TXT record in your domain's DNS settings.
Here's a step-by-step guide:
1. Log in to the Google Admin Console:
Visit admin.google.com and sign in with your admin account.
2. Navigate to DKIM settings:
From the Admin console Home page, go to Apps > Google Workspace > Gmail.
Scroll down and click on Authenticate email. You will now be in the section where you can set up DKIM.
3. Generate the DKIM key:
In the "Authenticate email" section, select the domain for which you want to generate a DKIM key.
Click on Generate new record. Usually, a 2048-bit key length is recommended for better security.
After generation, Google will provide you with the DNS record name (usually in the format of [selector]._domainkey.yourdomain.com) and its corresponding value.
4. Add the DKIM Record to Your Domain’s DNS Settings:
Go to where your domain's DNS settings are managed (e.g., Google Domains, GoDaddy, Cloudflare, etc.).
Create a new TXT record.
In the Name/Host/Label field, enter the DNS record name provided by Google (the selector part, e.g., google._domainkey).
In the Value field, enter the value provided by Google (it will start with v=DKIM1; ...).
Save your changes.
5. Wait for DNS Propagation:
DNS changes can take anywhere from a few minutes to 48 hours to propagate across the internet. However, usually, it takes just a few hours.
6. Verify and Activate DKIM:
After you believe the DNS has had time to propagate, go back to the Google Admin Console.
Navigate again to Apps > Google Workspace > Gmail > Authenticate email.
Click on Start authentication.
Google will check the DNS records for your domain to verify the DKIM TXT record. If everything is set up correctly, DKIM signing will be activated for your domain.
7. Test DKIM:
Send an email from your Google Workspace domain to another email address you have access to.
Check the received email headers. There should be a header that starts with "DKIM-Signature" indicating that the email has been signed.
With DKIM set up and verified for your Google Workspace domain, your emails will have an added layer of authentication, making them less likely to be flagged as spam and more difficult to spoof. As always, consider also setting up SPF and DMARC for a comprehensive email security strategy.
Using DMARC:
Setting up DMARC for a domain that uses Google Workspace (formerly G Suite) for its email services helps protect against fraudulent use of the domain and email spoofing. DMARC builds upon SPF (Sender Policy Framework) and DKIM (DomainKeys Identified Mail) by allowing domain owners to define a policy on how recipients should handle unauthenticated mail.
Here are the steps to set up DMARC for a domain using Google Workspace:
Ensure SPF and DKIM Are Configured:
Before implementing DMARC, ensure that SPF and DKIM are already configured for your domain.
SPF for Google Workspace typically looks like: v=spf1 include:_spf.google.com ~all
DKIM would have been set up following instructions from the Google Admin Console and will result in a TXT record in your DNS.
Decide on a DMARC Policy:
Decide what should happen to mail that fails the DMARC checks:
none: No action on the email (used mainly for monitoring).
quarantine: Place the email in the recipient's spam or junk folder.
reject: Reject the email and don't deliver it.
Create the DMARC Record:
The DMARC policy is communicated through a TXT record in your domain's DNS.
A basic DMARC record might look something like this:
cssCopy code
v=DMARC1; p=none; rua=mailto:reports@yourdomain.com;
This record specifies a DMARC policy of none (no action on failed messages) and asks that aggregate reports be sent to reports@yourdomain.com.
Add the DMARC Record to Your Domain’s DNS:
Log in to your domain registrar or DNS hosting provider.
Add a new TXT record with the following details:
Name/Host: _dmarc
Value: The DMARC policy you created (e.g., v=DMARC1; p=none; rua=mailto:reports@yourdomain.com;)
Monitor and Adjust:
Start with a policy of none to collect data without affecting your email traffic.
As you receive DMARC reports and understand your email sending patterns better, you can adjust your policy to quarantine or reject.
Regularly review the DMARC reports to identify any legitimate sources of email that aren't authenticated so that you can update your SPF or DKIM settings as necessary.
Advanced DMARC Options:
The DMARC record can also include additional tags for more granular control, such as:
pct: The percentage of messages to which the DMARC policy is applied.
ruf: An email address to which forensic reports are sent.
sp: The DMARC policy to apply to subdomains.
You can learn more about these options from the DMARC specification.
Remember, while setting up DMARC can improve the trustworthiness of your domain's email, incorrect configurations can result in legitimate email being quarantined or rejected. Therefore, approach the transition with care, start with a "monitoring" mode, and adjust based on the data you collect.
ElephantRock Solutions LLP.